- Selecting seeds for better nutrition
- Getting started with home gardening
- Sprouting techniques for maximum nutrients
- Growing your own microgreens
- Incorporating homegrown produce into meals
When diving into the plant-to-plate journey, choosing the right seeds can make all the difference in boosting your nutritional intake. Let’s talk about some powerhouse seeds that’ll give you the biggest bang for your buck. Quinoa seeds, for instance, pack a complete protein punch and grow surprisingly well in container gardens. Pumpkin seeds aren’t just for Halloween – these plants produce nutrient-dense seeds loaded with zinc and magnesium.
Your diet can benefit tremendously from carefully selected varieties of common vegetables too. Red and purple vegetables typically contain more antioxidants than their paler cousins, so opt for seeds of purple carrots, red kale, and burgundy beans. Don’t overlook amaranth – this ancient grain’s seeds are protein-rich and the leaves are packed with iron.
For year-round nutrition, consider selecting seeds that offer multiple edible parts. Swiss chard provides mineral-rich leaves throughout the season, while beets give you both nutritious greens and vitamin-packed roots. Sunflower seeds are another versatile choice – you can harvest the sprouts, enjoy the seeds, and even eat the unopened flower buds.
Remember to choose organic, non-GMO seeds whenever possible. These haven’t been treated with synthetic chemicals and often contain higher levels of beneficial compounds. For the best results, look for seeds labeled as “high-germination” or “guaranteed viable” – there’s nothing more disappointing than planting duds!
Here’s a quick list of nutrient-dense seeds to consider for your garden:
- Kale (especially Russian and Lacinato varieties)
- Butternut squash (rich in beta-carotene)
- Dark leafy Asian greens (pak choi, tatsoi)
- Rainbow cherry tomatoes (various antioxidants)
- Purple pole beans (high in flavonoids)
Getting started with home gardening
Once you’ve selected your seeds, creating an optimal growing environment is crucial for success. Start by assessing your available space – whether it’s a sunny windowsill, balcony, or backyard plot. Even a small area can yield impressive results when properly planned. The key is maximizing efficiency through vertical gardening techniques and companion planting strategies.
For beginners, container gardening offers the perfect entry point into the plant-to-plate lifestyle. Start with containers at least 6 inches deep for most vegetables, ensuring proper drainage holes. Your initial seed selection will determine container size requirements – here’s a helpful guide:
| Container Depth | Suitable Plants | Space Between Seeds |
|---|---|---|
| 4-5 inches | Lettuce, Herbs, Radishes | 3-4 inches |
| 6-8 inches | Bush Beans, Spinach | 4-6 inches |
| 10-12 inches | Tomatoes, Peppers | 12-18 inches |
Soil quality dramatically impacts your garden’s success and the nutritional value of your produce. Create a rich growing medium by mixing organic potting soil with compost in a 70:30 ratio. This blend provides essential nutrients that will enhance your diet through better-quality vegetables.
Temperature control plays a vital role in germination. Most seeds prefer soil temperatures between 65-75°F. Using a simple soil thermometer can help you time your planting perfectly. Consider starting heat-loving plants indoors 6-8 weeks before your last frost date.
Proper watering techniques are crucial – seedlings need consistent moisture but not waterlogging. Install a drip irrigation system or use self-watering containers to maintain optimal moisture levels. Monitor your plants daily, especially during the critical germination period when seeds are transforming into seedlings.
Light exposure significantly affects plant growth and nutrient content. Most vegetables require 6-8 hours of direct sunlight daily. If natural light is limited, consider supplementing with grow lights positioned 4-6 inches above your seedlings, adjusting the height as plants grow.
Sprouting techniques for maximum nutrients
Let’s dive into the fascinating world of sprouting – it’s like unlocking a treasure chest of nutrients from your seeds. The process begins by selecting fresh, organic seeds specifically meant for sprouting. Alfalfa, mung beans, and broccoli seeds are perfect for beginners, each offering unique nutritional benefits for your diet.
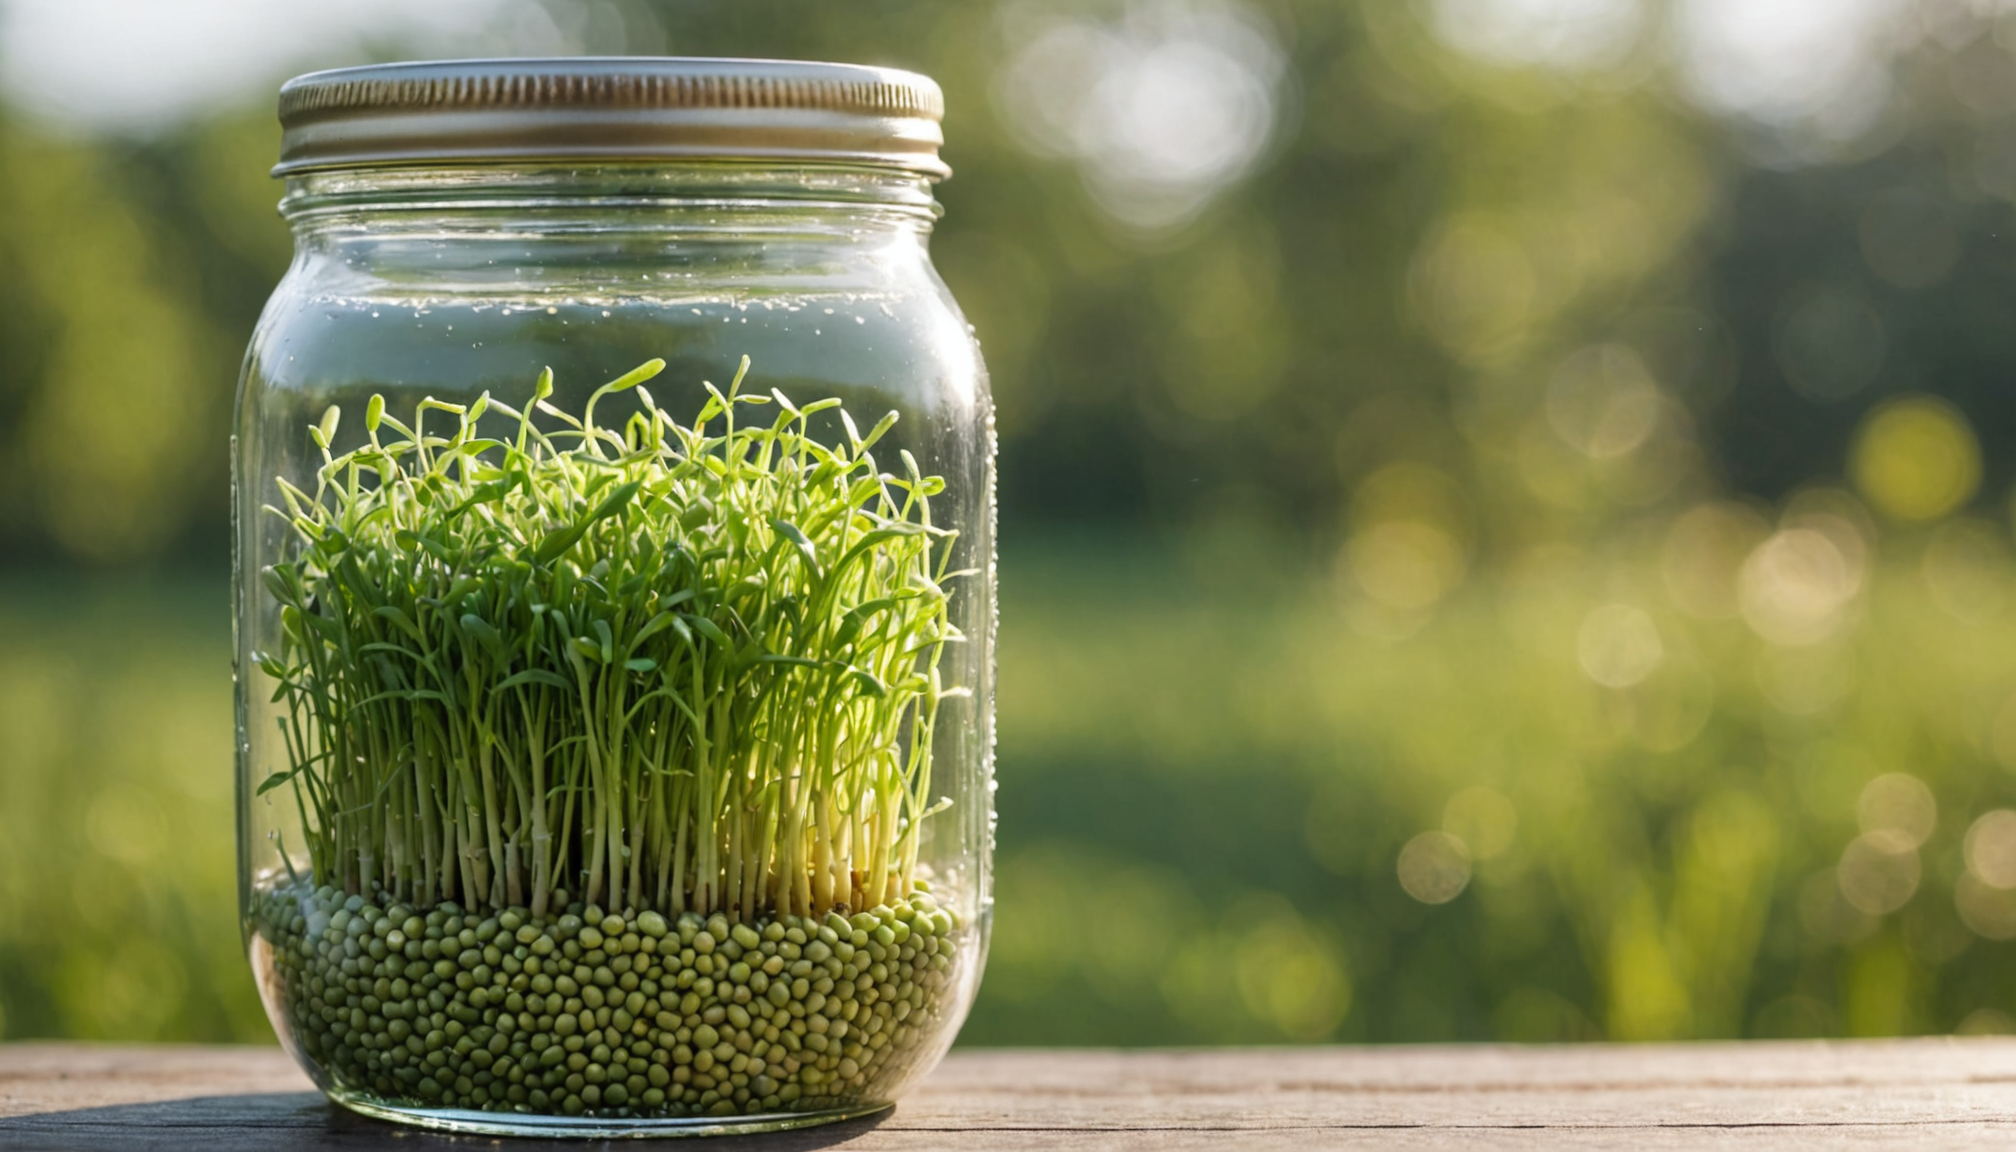
Start by rinsing your seeds thoroughly in cool water, then place them in a wide-mouth mason jar covered with a sprouting lid or cheesecloth. Fill the jar with water, ensuring the seeds are completely submerged, and let them soak for 8-12 hours. This initial soaking awakens the dormant seeds and kicks off the sprouting process.
Following the soaking period, drain the water completely and rinse the seeds twice daily. Position your jar at a 45-degree angle to allow excess water to drain while maintaining proper air circulation. Keep your sprouts in a spot with indirect light – direct sunlight can actually decrease nutrient content and cause unwanted heat buildup.
Different seeds have varying sprouting times and care requirements. Here’s a quick reference guide:
- Alfalfa: 4-5 days, rinse 2-3 times daily
- Mung beans: 3-4 days, rinse 3 times daily
- Broccoli: 3-5 days, rinse 2 times daily
- Radish: 3-4 days, rinse 2-3 times daily
- Lentils: 2-3 days, rinse 2 times daily
For maximum nutritional benefits in your plant-to-plate journey, harvest your sprouts when they reach optimal length – usually when the tail is about 1-2 inches long. Before storing, give them a final rinse and allow them to dry completely. Store them in a container lined with paper towels in the refrigerator, where they’ll stay fresh for about a week.
To ensure food safety, always use clean equipment and wash your hands before handling sprouts. If you notice any unusual odors or signs of mold, it’s best to discard that batch and start fresh. Remember, properly grown sprouts can contain up to 100 times the enzyme content of their unsprouted counterparts!
Growing your own microgreens
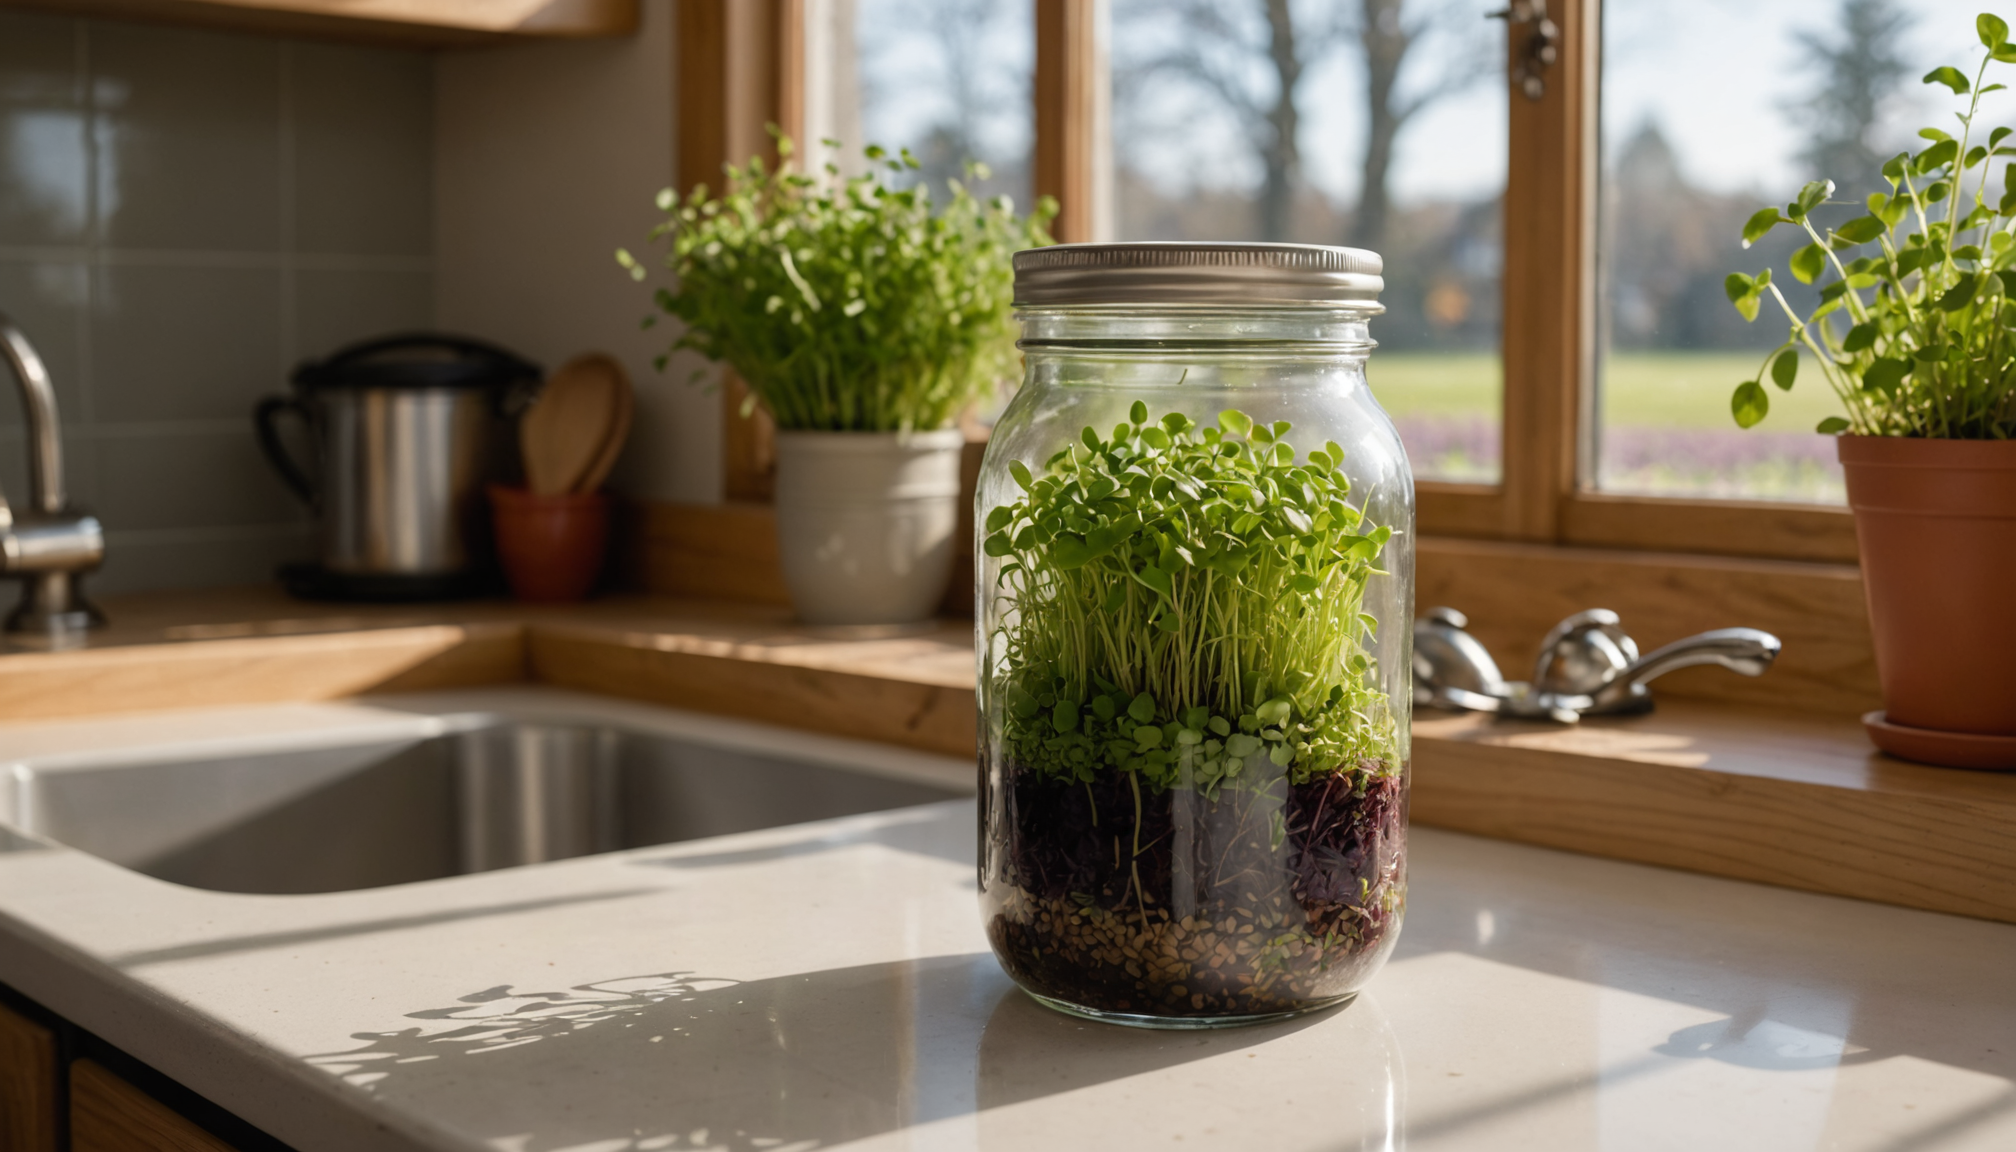
Microgreens represent a nutrient-dense powerhouse that can be grown year-round in minimal space. These tiny greens pack up to 40 times more nutrients than their mature counterparts, making them an excellent addition to your daily diet. Unlike sprouts, microgreens are grown in soil or growing medium and harvested just above the soil line when their first true leaves appear.
“Microgreens are not just a garnish – they’re a nutritional powerhouse containing up to 40 times the vitamins and minerals of mature plants.” – Dr. Gene Lester, USDA Agricultural Research Service
- Prepare your growing container:
– Use a shallow tray with drainage holes
– Fill with 1-2 inches of sterile potting mix
– Moisten soil thoroughly before planting - Sow your seeds:
– Spread seeds densely but evenly
– Press gently into soil without covering
– Mist with water to ensure good contact - Care and maintenance:
– Keep soil consistently moist
– Maintain temperature between 65-75°F
– Provide 12-16 hours of light daily - Harvesting:
– Cut just above soil level when first true leaves appear
– Use clean, sharp scissors
– Harvest at 7-14 days, depending on variety
For optimal plant-to-plate results, experiment with different seed varieties like red amaranth, purple basil, and golden pea shoots. These varieties not only offer stunning visual appeal but also provide diverse nutritional profiles. Consider growing multiple trays in succession, starting new seeds every 5-7 days to ensure a continuous supply for your everyday meals.
Incorporating homegrown produce into meals
 Transform your kitchen into a vibrant hub of fresh flavors by seamlessly integrating homegrown produce into your daily meals. Start by creating a harvest schedule that aligns with your cooking routine – pick leafy greens and herbs in the morning when their nutrient content peaks. Keep a basket in your kitchen specifically for daily harvests, making it easier to incorporate fresh ingredients into your plant-to-plate lifestyle.
Master the art of using every edible part of your plants to maximize your garden’s contribution to your diet. Carrot tops make excellent pesto, beet greens can be sautéed like spinach, and even seed pods from plants like peas and radishes add unique textures to stir-fries. Create a “garden-first” meal planning approach by checking what’s ready for harvest before deciding on recipes.
Design your meals around harvest times by implementing these practical strategies:
– Keep a container of mixed salad greens on your kitchen counter for easy access
– Pre-wash and store harvested vegetables in glass containers with damp cloth
– Create designated zones in your refrigerator for different types of produce
– Prepare herb-infused oils and vinegars to preserve abundant harvests
– Flash-freeze excess produce in small portions for future use
Experiment with preservation methods to extend the seasonal bounty. Quick-pickle surplus vegetables, dehydrate herbs for winter use, and freeze pestos in ice cube trays. Learn to combine fresh-picked items with pantry staples – toss just-harvested microgreens with stored grains, or blend fresh herbs into homemade dressings.
Consider texture and flavor combinations when planning garden-to-table meals. Partner crisp radish sprouts with creamy avocados, or contrast sweet cherry tomatoes with spicy arugula. Create signature dishes that showcase your garden’s diversity – layer colorful microgreens atop soups, fold fresh herbs into omelets, or crown your salads with edible flowers.

