- Planning your garden space
- Selecting the right seeds
- Starting seedlings indoors
- Transplanting and soil preparation
- Harvesting and serving techniques
Before diving into those tempting seed packets, let’s map out your growing space like a pro. Even a tiny balcony or kitchen windowsill can transform into a thriving salad garden. Start by tracking sunlight patterns in your chosen area – most leafy greens need 4-6 hours of direct sun daily, while tomatoes and peppers crave 6-8 hours.
When working with limited space, think vertically! Wall-mounted planters, tiered stands, and hanging baskets can triple your growing area. A sunny 4×4 foot plot can yield enough greens to fill your salad bowls all season long. For container gardening, ensure each pot is at least 6 inches deep for shallow-rooted lettuce and up to 12 inches for deeper-rooted vegetables.
Consider the natural flow of your space. Position taller plants like tomatoes and climbing peas where they won’t shade shorter crops. Leave enough room between plants for easy harvesting – you’ll want to reach those tender greens without stepping on your soil. Setting up a simple irrigation system early on, whether it’s a soaker hose or self-watering containers, will save countless hours throughout the growing season.
The transformation from empty space to edible garden starts with smart placement. Group plants with similar water needs together, and keep herbs close to your kitchen door for easy snipping. Remember to factor in space for successive plantings – when one crop of lettuce is finished, you’ll want room ready for the next round.
Selecting the right seeds
Choosing seeds requires careful consideration of your climate zone, growing season length, and culinary preferences. High-quality seed packets from reputable suppliers offer essential information about germination rates, spacing requirements, and days to maturity. The transformation from tiny seeds to abundant harvests begins with selecting varieties that match your growing conditions.
| Salad Green | Days to Maturity | Growing Difficulty | Best Season |
|---|---|---|---|
| Loose Leaf Lettuce | 45-55 days | Easy | Spring/Fall |
| Arugula | 30-40 days | Easy | Spring/Fall |
| Baby Spinach | 35-45 days | Moderate | Spring/Fall |
| Cherry Tomatoes | 65-75 days | Moderate | Summer |
For consistent salad bowls throughout the season, opt for “cut-and-come-again” varieties that regrow after harvesting. Look for seed packets labeled as heat-resistant or bolt-resistant for summer plantings. Consider selecting a mix of quick-growing greens like arugula and slower-maturing vegetables like tomatoes to ensure continuous harvests.
Heirloom varieties offer unique flavors and colors, while hybrid seeds typically provide better disease resistance and uniform growth. Many seed packets now include specialized varieties for container growing or compact spaces. When selecting herbs, choose between annual varieties like basil and cilantro, which need regular replanting, and perennial options like thyme and oregano that return yearly.
Store unused seeds in an airtight container in a cool, dry place. Most vegetable seeds remain viable for 2-3 years when properly stored, though germination rates may decrease over time. Create a seed inventory system to track planting dates and performance, helping refine your selections for future growing seasons.
Starting seedlings indoors

Ready to start your seeds indoors? This exciting transformation begins 6-8 weeks before your last frost date. Begin with clean containers – whether you’re using seed starting trays, recycled yogurt cups, or egg cartons – just ensure they have drainage holes. Fill them with a sterile seed starting mix, not garden soil, to prevent dampening off disease.
Create perfect growing conditions by maintaining soil temperature between 65-75°F. A heat mat can work wonders for germination, but once seedlings emerge, it’s all about light. Position your grow lights just 2-3 inches above the plant tops, adjusting height as they grow. Keep lights on for 14-16 hours daily – your seedlings need way more light than a windowsill typically provides.
Those tiny sprouts destined for your future salad bowls need consistent moisture. Water from the bottom by placing trays in a shallow dish of water, allowing soil to wick up moisture. This prevents disturbing delicate seeds and reduces the risk of fungal problems. A clear dome or plastic wrap over the containers creates a mini greenhouse effect until germination.
Once your seedlings develop their first true leaves (not the initial seed leaves), begin feeding them with a quarter-strength liquid organic fertilizer weekly. Start “hardening off” your plants two weeks before transplanting by gradually exposing them to outdoor conditions. Begin with one hour of filtered sunlight, increasing exposure daily.
While those seed packets promised picture-perfect plants, don’t get discouraged if some seedlings don’t make it – it’s all part of the learning process. Thin overcrowded containers to ensure proper air circulation, keeping the strongest seedlings. Gently running your hand over the tops of your seedlings daily simulates wind and helps develop stronger stems.
- Monitor moisture daily – soil should be damp but not waterlogged
- Label everything! Use popsicle sticks or plastic markers
- Rotate trays every few days to prevent leggy growth
- Keep a small fan running nearby to strengthen stems and prevent mold
Transplanting and soil preparation
Preparing your garden bed or containers for transplanting requires careful attention to soil composition and timing. The transformation from indoor seedlings to outdoor growing spaces marks a crucial phase in your garden’s development. Creating the perfect environment begins with a soil test to determine pH levels and nutrient content.
- Remove all weeds and debris from your growing area
- Loosen soil to a depth of 12-15 inches
- Incorporate 2-3 inches of compost into the top layer
- Level the soil surface with a rake
- Pre-moisten the planting area thoroughly
“The soil is the great connector of lives, the source and destination of all. It is the healer and restorer and resurrector, by which disease passes into health, age into youth, death into life.” – Wendell Berry
When moving seedlings from seed packets to their permanent homes, timing is everything. Transplant on a cloudy day or during the early evening to minimize transplant shock. Create planting holes twice the width of your seedling containers and at the same depth. Gently remove plants from their containers, being careful not to damage roots. Position each seedling slightly deeper than it grew in its starter pot, especially for tomatoes which can develop additional roots along their stems.
For container gardens, use high-quality potting mix rather than garden soil. Fill containers to within 2 inches of the rim, allowing space for watering. Add slow-release organic fertilizer to provide steady nutrition throughout the season. Water deeply immediately after transplanting, and maintain consistent moisture until plants show signs of new growth. Consider adding mulch around transplants to retain moisture and suppress weeds, keeping your future salad bowls well-supplied with fresh ingredients.
Harvesting and serving techniques
 The transformative moment arrives when those carefully nurtured plants are ready for harvest. Timing is crucial – pick leafy greens in the cool morning hours when they’re crisp and full of moisture. Most salad leaves can be harvested using the cut-and-come-again method: snip leaves about two inches above the soil line, allowing the plant to regenerate for future harvests.
Different vegetables require specific harvesting techniques. Harvest loose-leaf lettuce from the outside, leaving the center to continue growing. Snip baby greens when they reach 3-4 inches tall, and pluck cherry tomatoes when they’ve developed full color. Baby spinach leaves offer the sweetest flavor when picked young, while arugula can be harvested at any size depending on your preference for mild or peppery flavors.
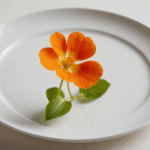
Create stunning salad bowls by combining textures and colors. Layer crisp lettuce with tender microgreens, adding edible flowers like nasturtiums or borage for visual appeal. Fresh herbs transform ordinary greens into gourmet experiences – try mixing basil, dill, or cilantro with your standard salad mix. Store harvested greens in sealed containers lined with slightly damp paper towels, keeping them fresh for up to a week.
Proper washing technique preserves the quality of your harvest. Submerge greens in cool water, gently swishing to remove soil particles. A salad spinner becomes invaluable for drying leaves without bruising them. For the crispest results, soak harvested greens in ice water for 15 minutes before spinning dry.
Consider succession planting to ensure continuous harvests – as you gather mature leaves from one set of plants, seedlings from your seed packets should be ready to fill empty spaces. Maintain garden records noting which varieties perform best and when they reach peak flavor. Some plants, like kale and Swiss chard, become sweeter after light frost, extending your harvest season well into autumn.
Maximize your yield by knowing when to pull entire plants versus harvesting individual leaves. Root vegetables like radishes and baby carrots must be completely removed, while herbs can be continually pruned to encourage bushier growth. Save space in your garden by incorporating vertical elements – pea shoots and nasturtiums can climb while lettuces grow below.


